Azure IoT Hub
Microsoft Azure IoT Hub enables highly secure and reliable communication between your Internet of Things (IoT) application and the devices it manages.
To help ensure stable device connectivity only use Console to connect to client ids. Other device monitoring tools in IoT Hub will connect to the device using the same client id which will cause connectivity instability.
important
For more information getting started with the Azure IoT Hub integration, check out our Tips & Tricks video on YouTube here.
On Azure IoT Hub
Prior to setting up an integration in Console, the following Azure IoT Hub information is required: Primary Connection String.
The string can be found by clicking Device Explorer on the Azure IoT Hub and then clicking on your device name.
Log into your Azure IoT Hub account and on the left hand menu go to "Shared access policies".
Console requires the following permissions.
- Registry Read: query Azure for devices in your hub
- Registry Write: create devices in your hub
- Device Connect: send messages through http/mqtt to your azure device
important
You must create your own policy and ensure it includes the permissions listed above. Although the iothubowner policy includes those by default it's not designed to be used for external integrations.
On Console
To add the integration in Console, go to Integrations on the left-hand menu.
Click the Add integration button.

Choose the Azure IoT integration icon.

Enter the Azure IoT Hub Primary Connection String information into the Console. Once the string has been added the following details will be automatically filled based on the information contained in the string:
Hub NamePolicy NamePrimary Key
Remember the Azure IoT Hub policy must have the following permissions enabled: Registry Read, Registry Write, and Device Connect.
Adding a device
Every time the Azure IoT Hub integration starts up on Console, it will check if the device exists on IoT Hub, and if it doesn’t it will create one.
Azure IoT Central
According to Microsoft, "Azure IoT Central is highly secure, scales with your business as it grows, ensures your investments are repeatable, and integrates with your existing business apps." Read more about Azure IoT Central here.
On Azure IoT Central
Prior to setting up an integration in Console, the following Azure IoT Central information is required:
- API Key (role app administrator, note this is only shown one time so copy and keep in a safe, retrievable location)
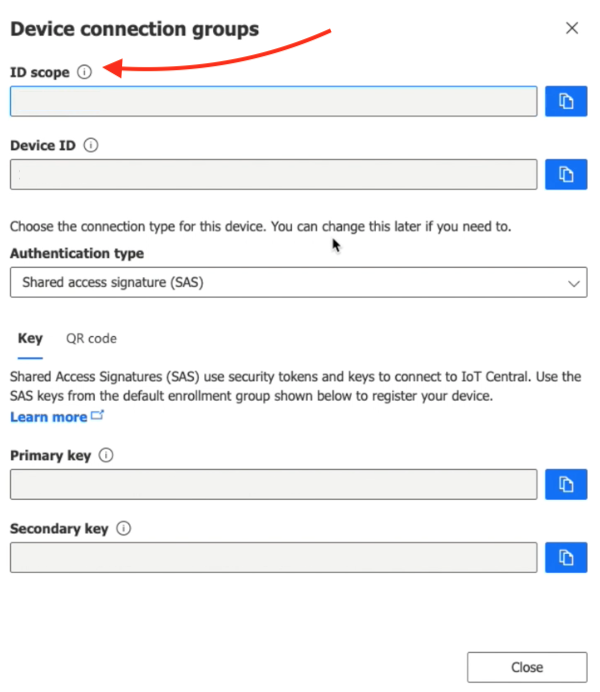
- ID scope (from Device connection groups)
- App Name (obtained from your Azure IoT Central url
<appname>.azureiotcentral.com)

On Console
To add the integration in Console, go to Integrations on the left-hand menu.
Click the Add integration button.

Choose the Azure IoT Central integration icon.
Enter the Azure IoT Central information into the Console:
- API Key
- Scope ID
- App Name
After providing a name and completing the integration, make sure the device/label is mapped to the Azure IoT Central Integration on the Flows page.
More information about Flows here.
important
Decoding of sensor data must occur prior to sending data to Azure IoT Central. More information on Decoder Functions here.
Adding a device
Every time the Azure IoT Central integration starts up on Console, it will check if the device exists on IoT Central, and if it doesn’t it will create one.